Panisses (Chickpea Fries)
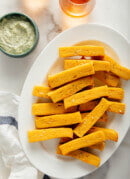
This foolproof panisse recipe yields crisp and golden chickpea fries, whether you choose to fry them or bake them! Both methods are offered in the recipe below. Recipe yields about 20 panisses, enough for 4 to 6 snack servings.
Ingredients
- 2 ¼ cups (262 grams) chickpea flour
- 1 ½ teaspoons fine salt
- 10 twists of freshly ground black pepper, plus more for serving
- 2 teaspoons + 4 tablespoons extra-virgin olive oil (for the baked version, or a generous amount of avocado or olive oil for frying), divided, plus more for greasing the pan
- 4 cups water
- Flaky sea salt or kosher salt, for serving
- Optional: creamy basil sauce, aioli or your sauce of choice
Instructions
- Lightly oil a 9-inch square baking dish with olive oil, and set it aside. If you’re frying the panisses, line a baking sheet or tray with paper towels to absorb excess oil.
- In a medium saucepan, combine the chickpea flour, salt, pepper and 2 teaspoons of the olive oil. Use a sturdy whisk to stir until combined, then pour in about half of the water and whisk until the mixture is smooth. Pour in the remaining water and whisk until smooth.
- Bring the mixture just to a boil over high heat, whisking frequently and vigorously (don’t step away from the stove). Once it reaches a boil, immediately reduce the heat to medium-low and continue cooking, whisking until the mixture thickens, holds its shape, and pulls away from the side of the pan, about 10 minutes. This takes some muscle toward the end!
- Immediately scrape the mixture into your prepared pan in an even layer, smoothing the top with a spatula. Let it cool completely at room temperature (about one hour), at which point it should be pulling back from the sides a little. Once the mixture has cooled, use a sharp knife to slice down the center of the dish, then cut across it repeatedly to make panisses ¾-inch wide.
- For the baked version: Preheat the oven to 425 degrees Fahrenheit and line a large, rimmed baking sheet with parchment paper. Use a small metal spatula to transfer each panisse to the baking sheet, leaving at least an inch of space around each piece.
- Generously brush the panisses with 2 tablespoons of the olive oil on all sides. Bake until the undersides are nicely golden, about 25 to 30 minutes. Remove the pan from the oven and place it on a heat-safe surface. Gently flip the panisses and lightly drizzle the remaining 2 tablespoons of olive oil down the length of the panisses. Return the pan to the oven and bake until the opposite sides are golden, about 15 to 20 more minutes.
- Sprinkle the panisses generously with flaky salt and pepper while they are hot out of the oven. Serve as desired. Beware that they stay hot on the inside for quite some time!
- For the fried version: In a large skillet, warm ¼ to ½ inch of avocado oil until shimmering (if you have a temperature gauge, keep the oil between 350 to 375 degrees at all times). Fry the panisses in batches, leaving space around each one. Once the bottom side is browned, use tongs to turn it to the next side until browned on all four sides, about 5 to 8 minutes per batch (they may cook more quickly as time goes on).
- Using tongs, transfer the panisses from the pan to the paper towel-lined pan. Sprinkle the panisses generously with flaky salt and pepper while they are hot out of the oven. Repeat with the remaining batches of panisses, adding more oil to the pan if needed. Serve as desired. Beware that they stay hot on the inside for quite some time!
Notes
Recipe adapted from David Lebovitz, with additional context provided by Saveur.
Make it vegan/dairy free/egg free: The panisses themselves are free of all those ingredients. This recipe is gluten-free, too. Choose your dipping sauce according to your special diet needs.
Nutrition
The information shown is an estimate provided by an online nutrition calculator. It should not be considered a substitute for a professional nutritionist’s advice. See our full nutrition disclosure here.
Find it online: https://cookieandkate.com/panisse/